lastmod: 11 May, 2020
Hello, RStudio!

Fig. 1: RStudio logo
This post is for those who open RStudio for the very fist time. It not an extensive post, and it is by no means a comprehensive tutorial. I’ll provide guidance on the spot for those who need it.
Each R (and RStudio) user develops, eventually, their own habbits of managing their statistical and data science projects. For the time being, I only ask you to bear with me for a short while, untill we can let go of the training wheels.
Here it goes. A suggested workflow, for the absolute beginners.
Create a folder for all your R projects
I find it easier and cleaner to set up a single folder or directory for all your R projects. Also, I think it’s best to have that folder in an easy to reach location, like the C: drive (if you’re using Windows) or your Home directory (if you’re on Mac), but ultimately, it is up to you. If you’re a more experienced user, you should have no problem navigating to that directory, regardless where you choose to place it. But, again, I find it cleaner to set up this R projects folder first.
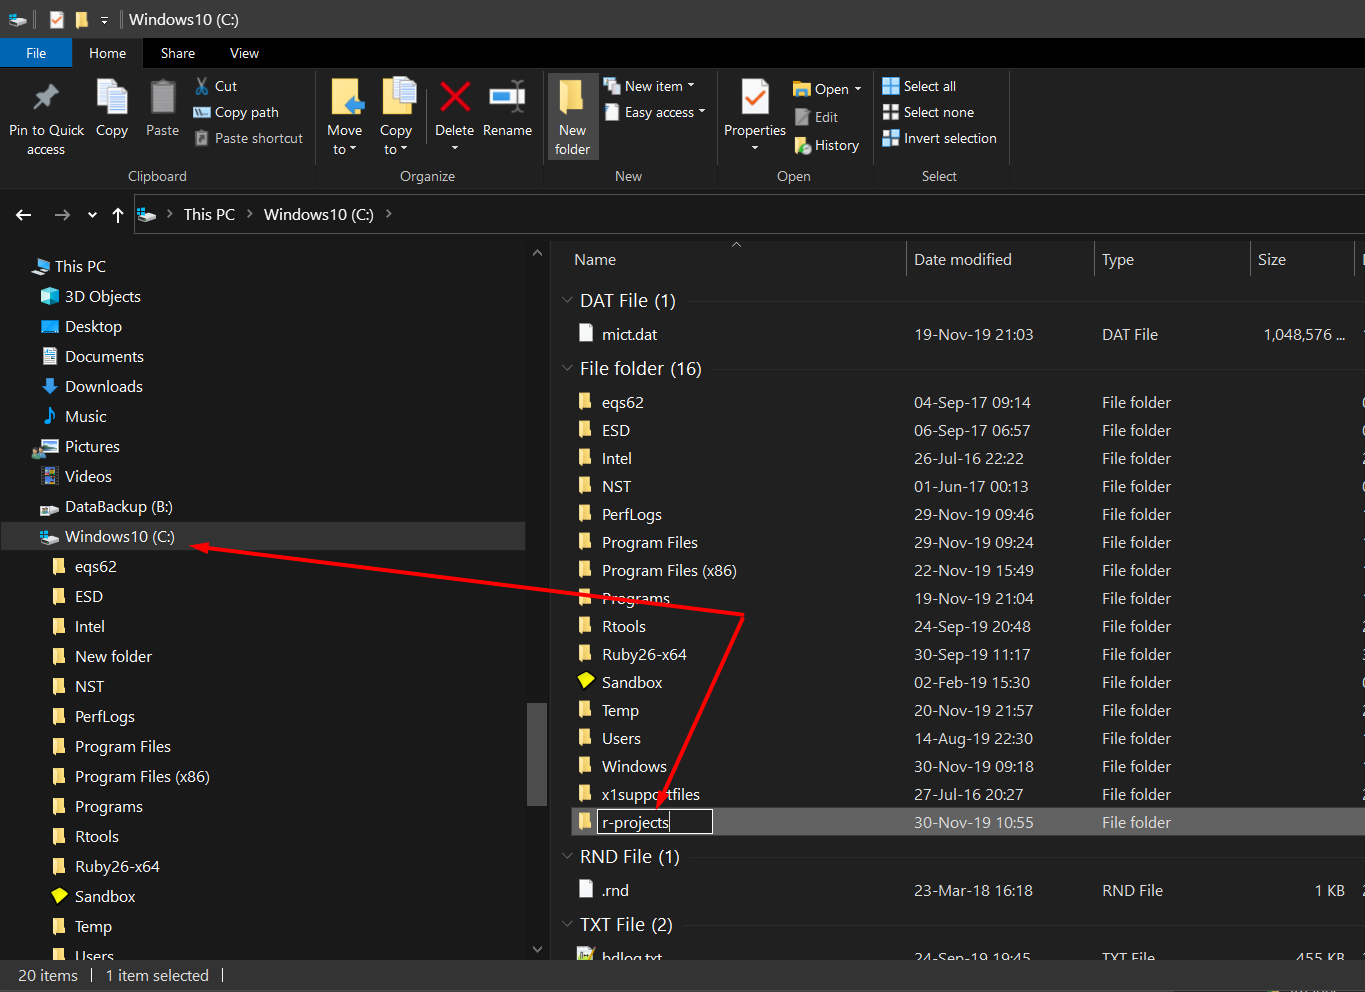
Fig. 2: Set up an R projects folder first of all
Once you’ve done that, you can manage everything else from within the R Studio.
Using R Studio to create the first project
Let’s create a project. Fire up R Studio and find the commands for a ‘new project’. You can do that either by going to the ‘File’ drop-down menu, and choose ‘New Project…’, in the menu bar, or look in the upper-right side of the main window for the text ‘Project: (None)’ with a small upside triangle right next to it.
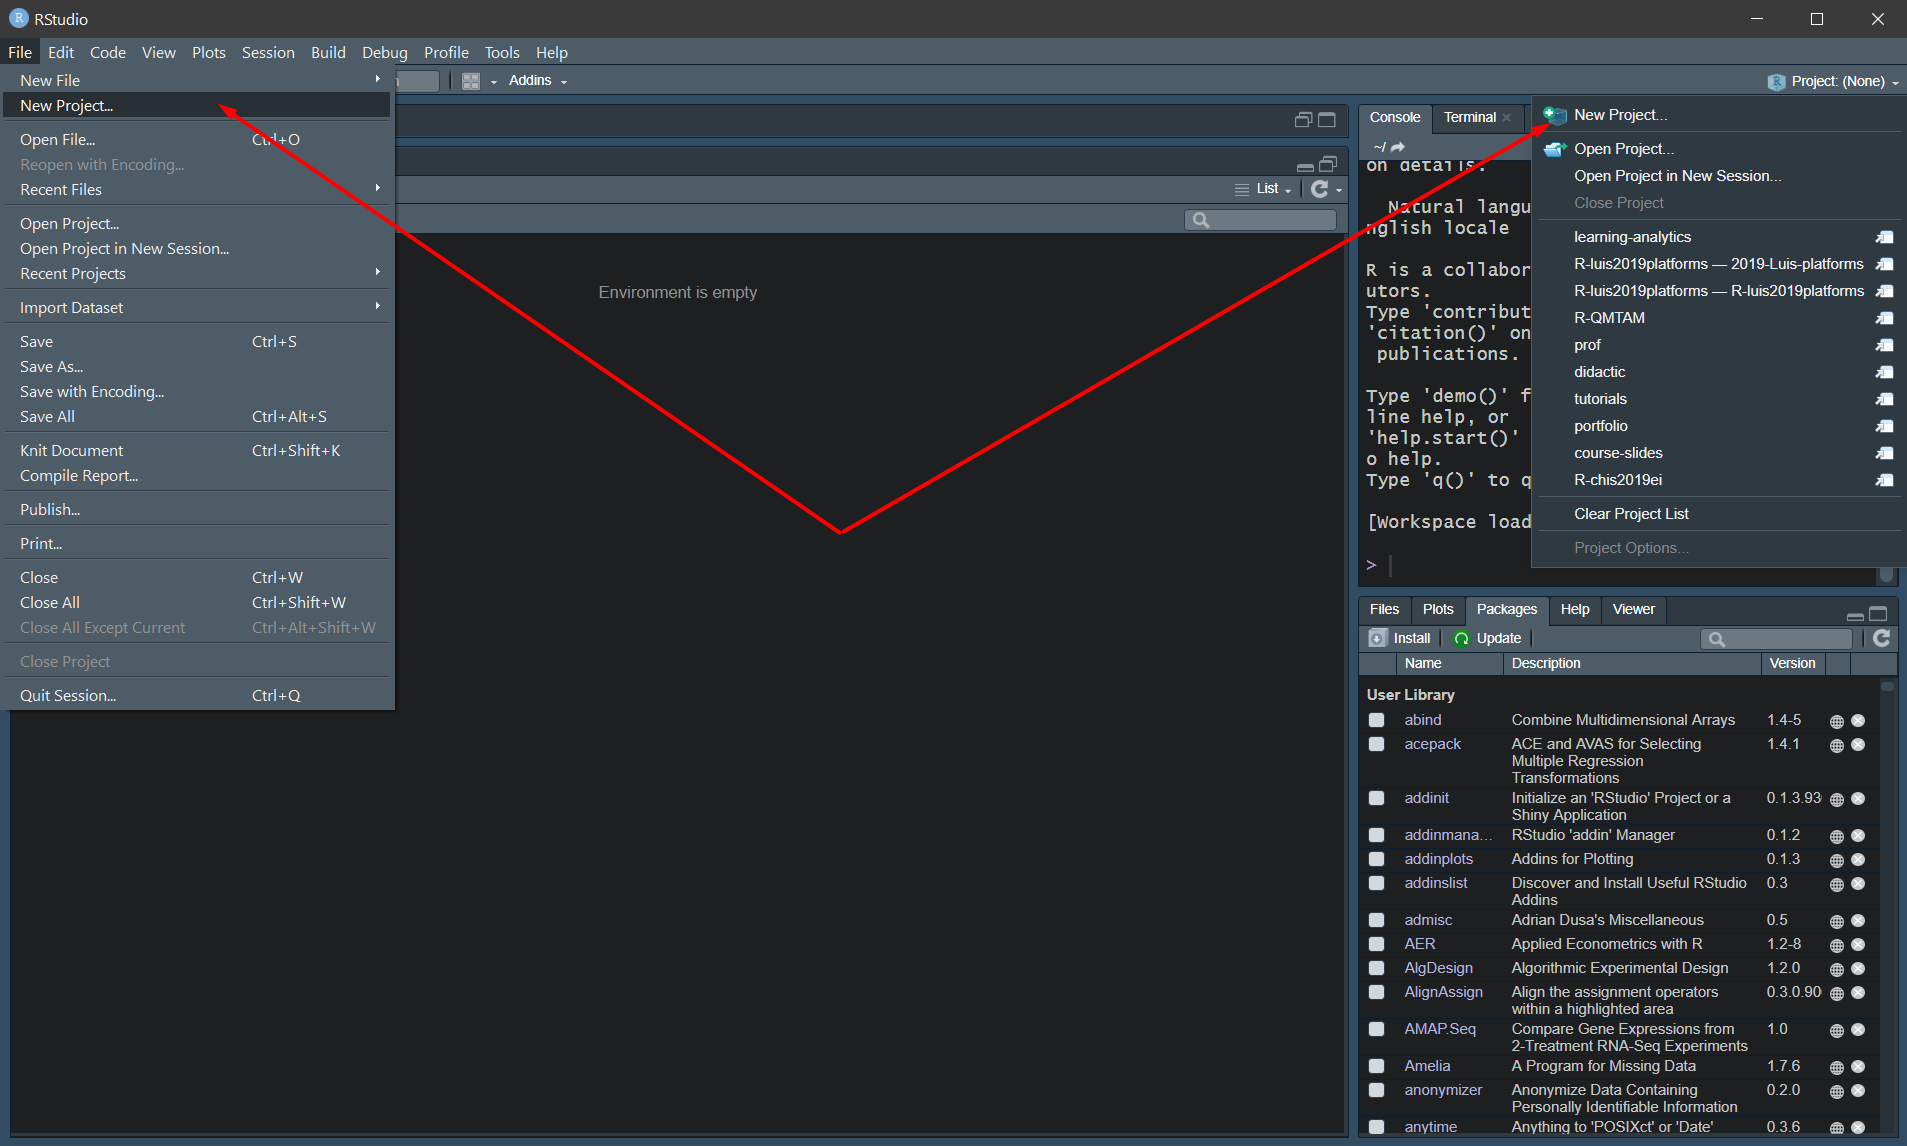
Fig. 3: Create new project from within R Studio
Once you gave the command ‘New Project…’, you’re pretty much down the rabbit hole, with no way back… Just kidding, everything is intuitive and logical. You’ll be taken through a series of windows and guided to make your first project. There are a few variations of projects that can be set up from this very beginning stage, but we’ll stick with the most basic ones. If you follow the images bellow, you should have no problems setting up your very first project.
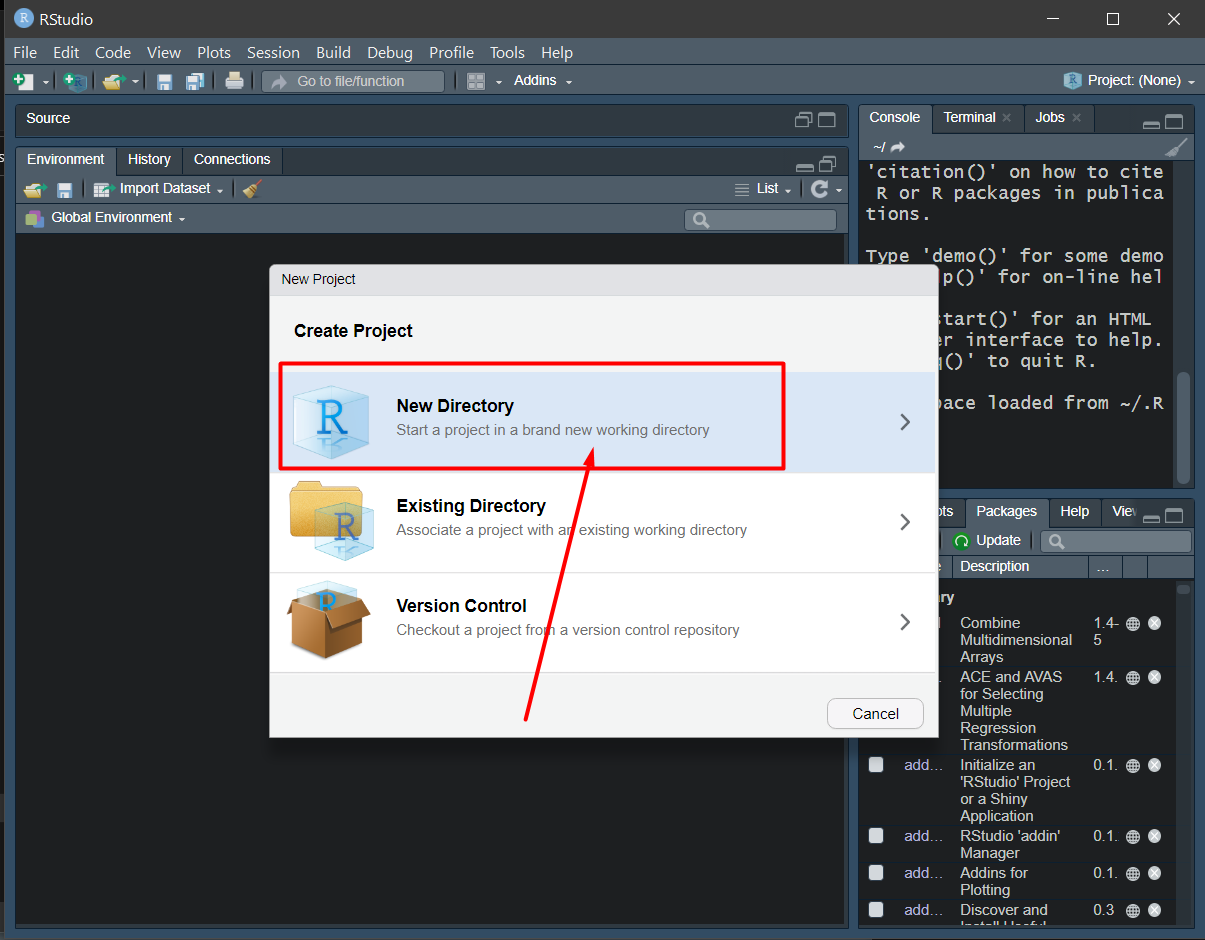
Fig. 4: Choose a ‘New Directory’ for your first project
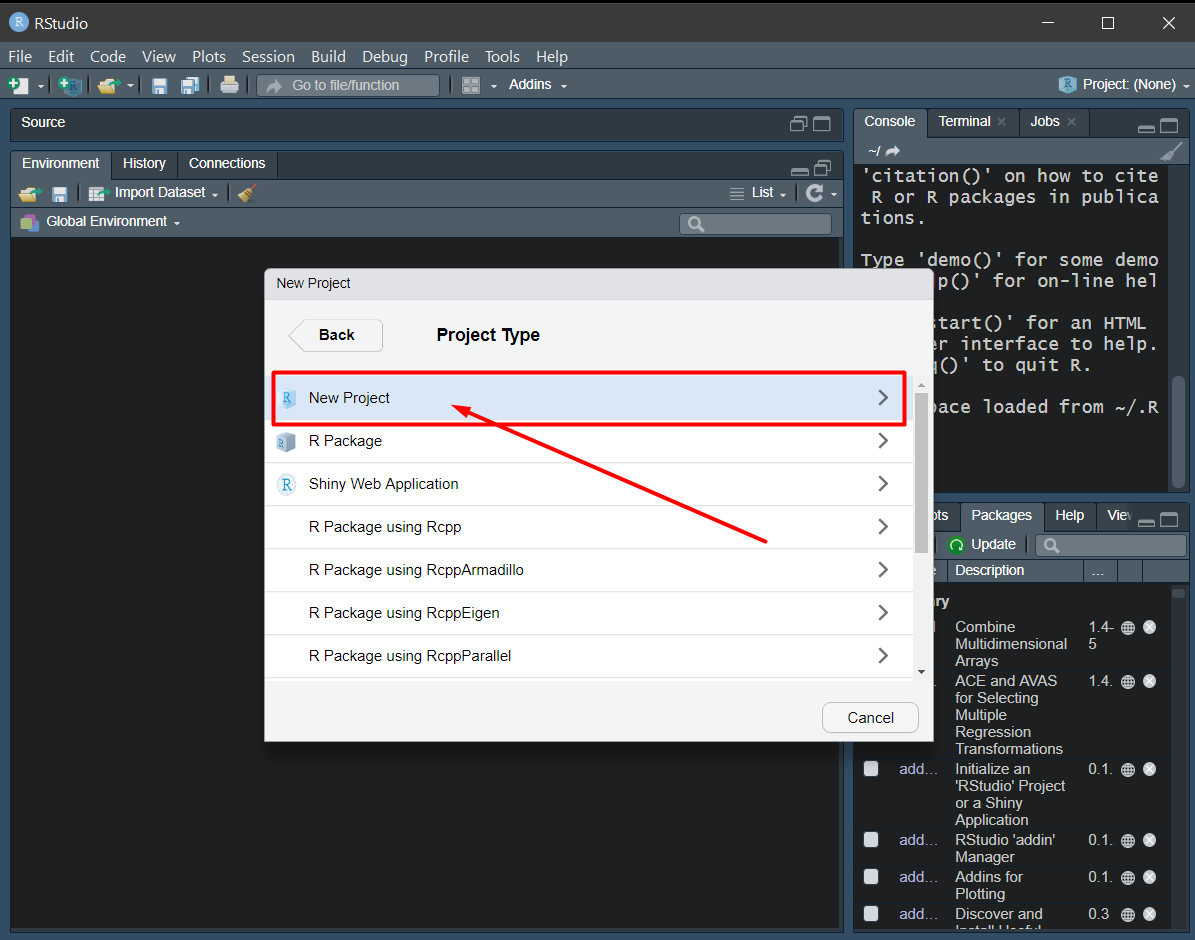
Fig. 5: Choose to create a ‘New Project’
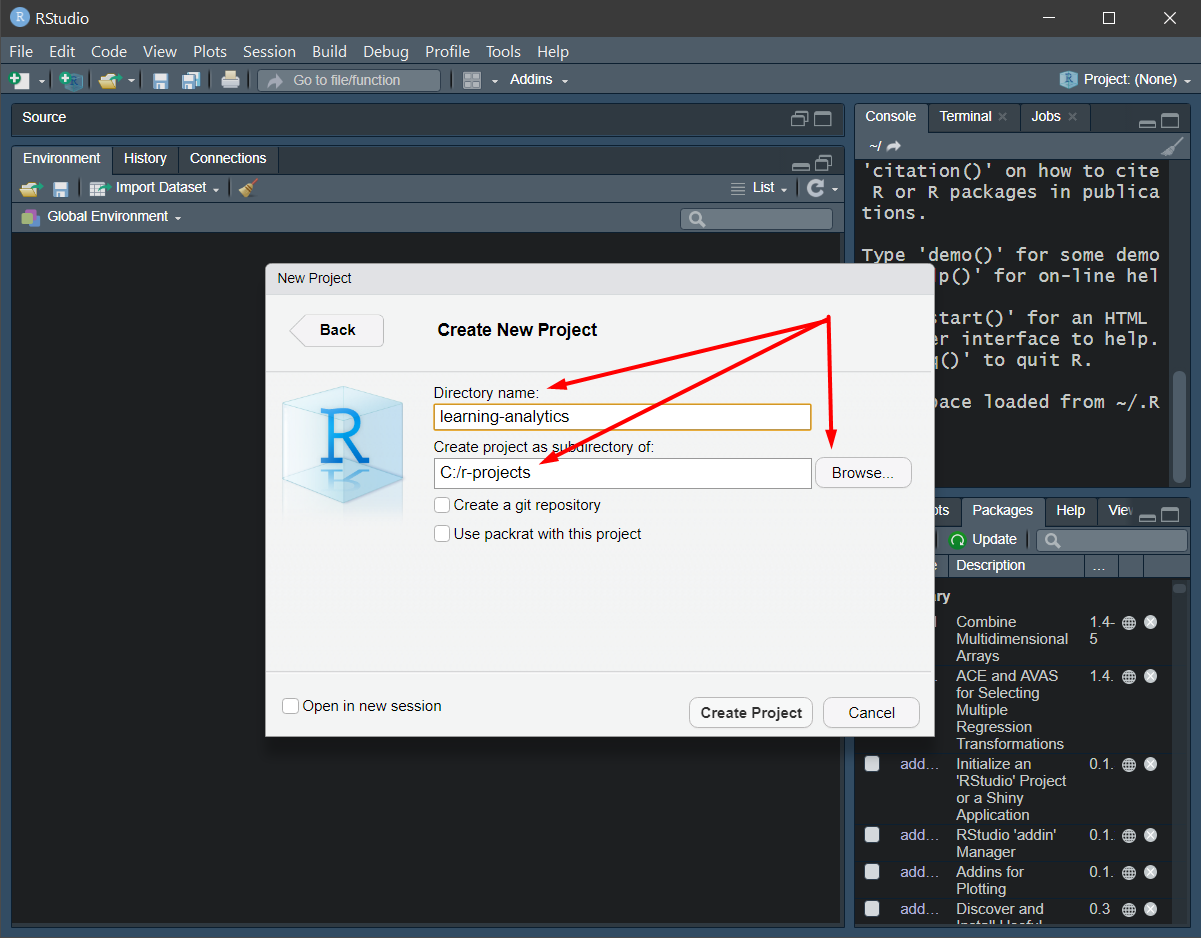
Fig. 6: Effectively create the ‘New Project’
This last command (see image below) requires a bit more attention. So, remember you already created your R projects folder in your C: drive or in your Home directory. If you placed it elsewhere, you’ll need to locate it. Regardless where you placed your R projects folder, you need to navigate to it and select it. You do that using the ‘Browse…’ button to the right of the the second text box (under “Create projects as subdirectory of:”). Once you identified and selected your R projects folder, the path to it should appear in the second box. Now, you only need to enter a name for your current project. It is important to note that once you enter a name (I’ve entered “learning-analytics”), R Studio will create another folder, within your R projects folder. In my case, the subfolder is called “learning-analytics” and inside it, I’ll have all the files and folders associated with my current project.
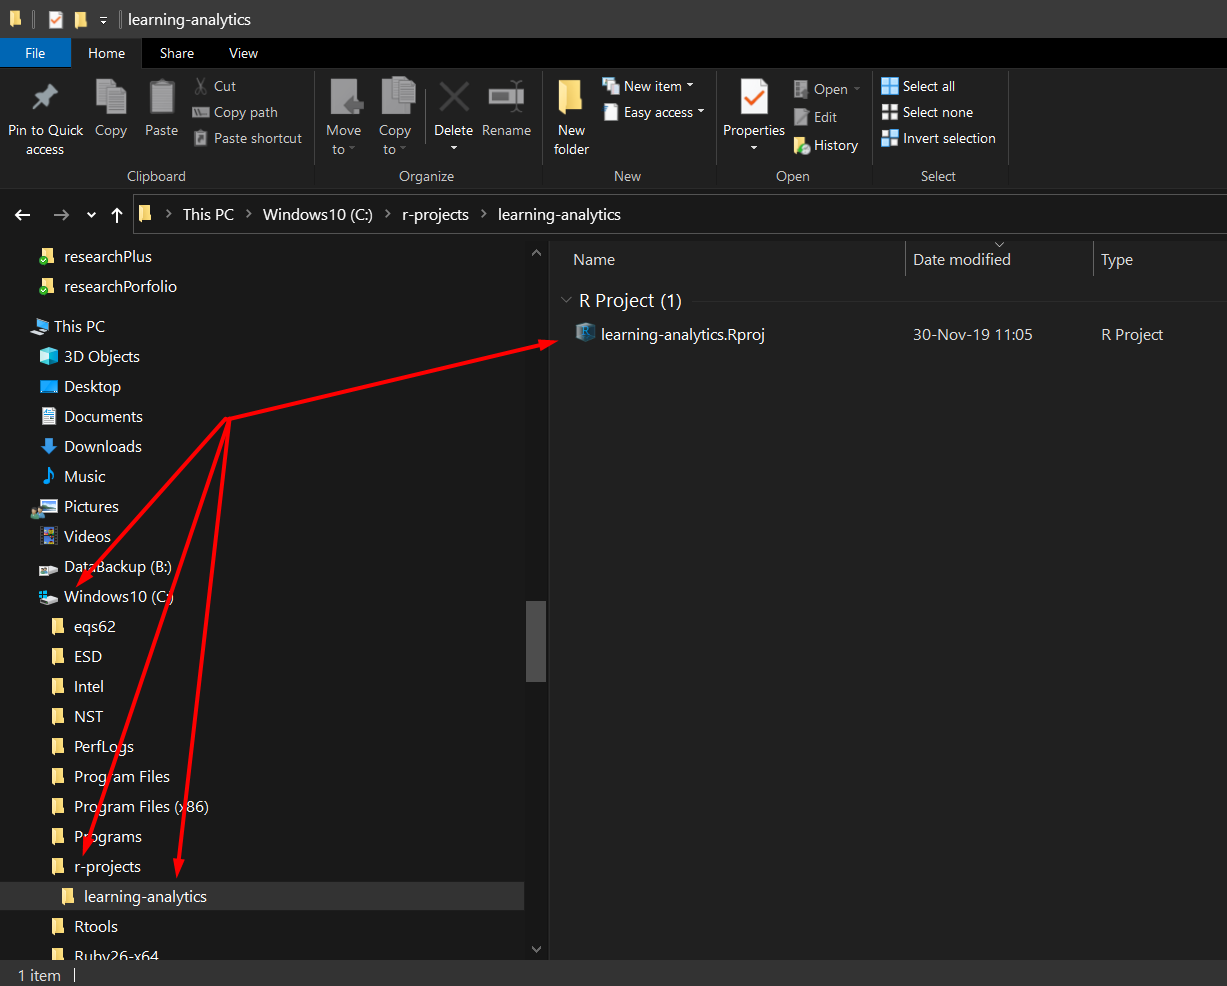
Fig. 7: Your learning-analytics.Rproj inside your ‘learning-analytics’ directory
A few steps in R Studio
We’re now ready to begin working with R Studio.
One of the first things you’ll always do is get the data you’ll be analyzing. For that, I suggest again to keep things clean and delimitated. For instance, one good practice is to have a folder for your data files. And, as I said already, you’ll be able to do almost everything from within R Studio. So, let’s create a folder from R Studio. Look for the ‘Files’ tab, in one of the four main windows or R Studio. There, use the ‘New Folder’ command to create a new folder within your ‘learning-analytics’ folder and name it ‘data’.
Just so you are warned, there are many ways to do the same thing in R and in R Studio… I, and anybody reasonably realistic, will never pretend to know or master them all. We are all creatures of habbits and we develop personal preferences. And, while I preach keeping an open mind, I must acknowledge that I am the victim of my own preferences and limitations. So, use the information here, but learn more, from others, and you’ll be able to select the best ways for yourself.
Getting data into your R project
You can simply click the link and dowload/save the data into your ‘data’ folder, within the ‘learning-analytics’ folder. And, for expediency and safety, that’s what you should do, anyway.
However, I stated before there’s little you cannot do from within R Studio itself, and I’m using this task of saving our data to demonstrate this.
We’ll do this for the first time using the ‘Console’. The Console should be in your upper-right quadrant, or look for it in the Tabs of the four (three) main RStudio windows.
Once you located the console, place, your cursor there and write the command from the text box below (do not write the comments, though; the comments are those lines of text prefaced by the pound sign #):
# identify and read the file using the `read.csv` function/command
# notes: just use the script as is, for now, and ignore additional specification like the `fileEncoding="UTF-8-BOM")
# notes: I'll explain those and other side notes on the go

read.csv("https://learning-analytics.dorinstanciu.com/post/intro-rstudio/data/toy-data.csv", fileEncoding = "UTF-8-BOM")
The results should appear also in the Console, right under your command line
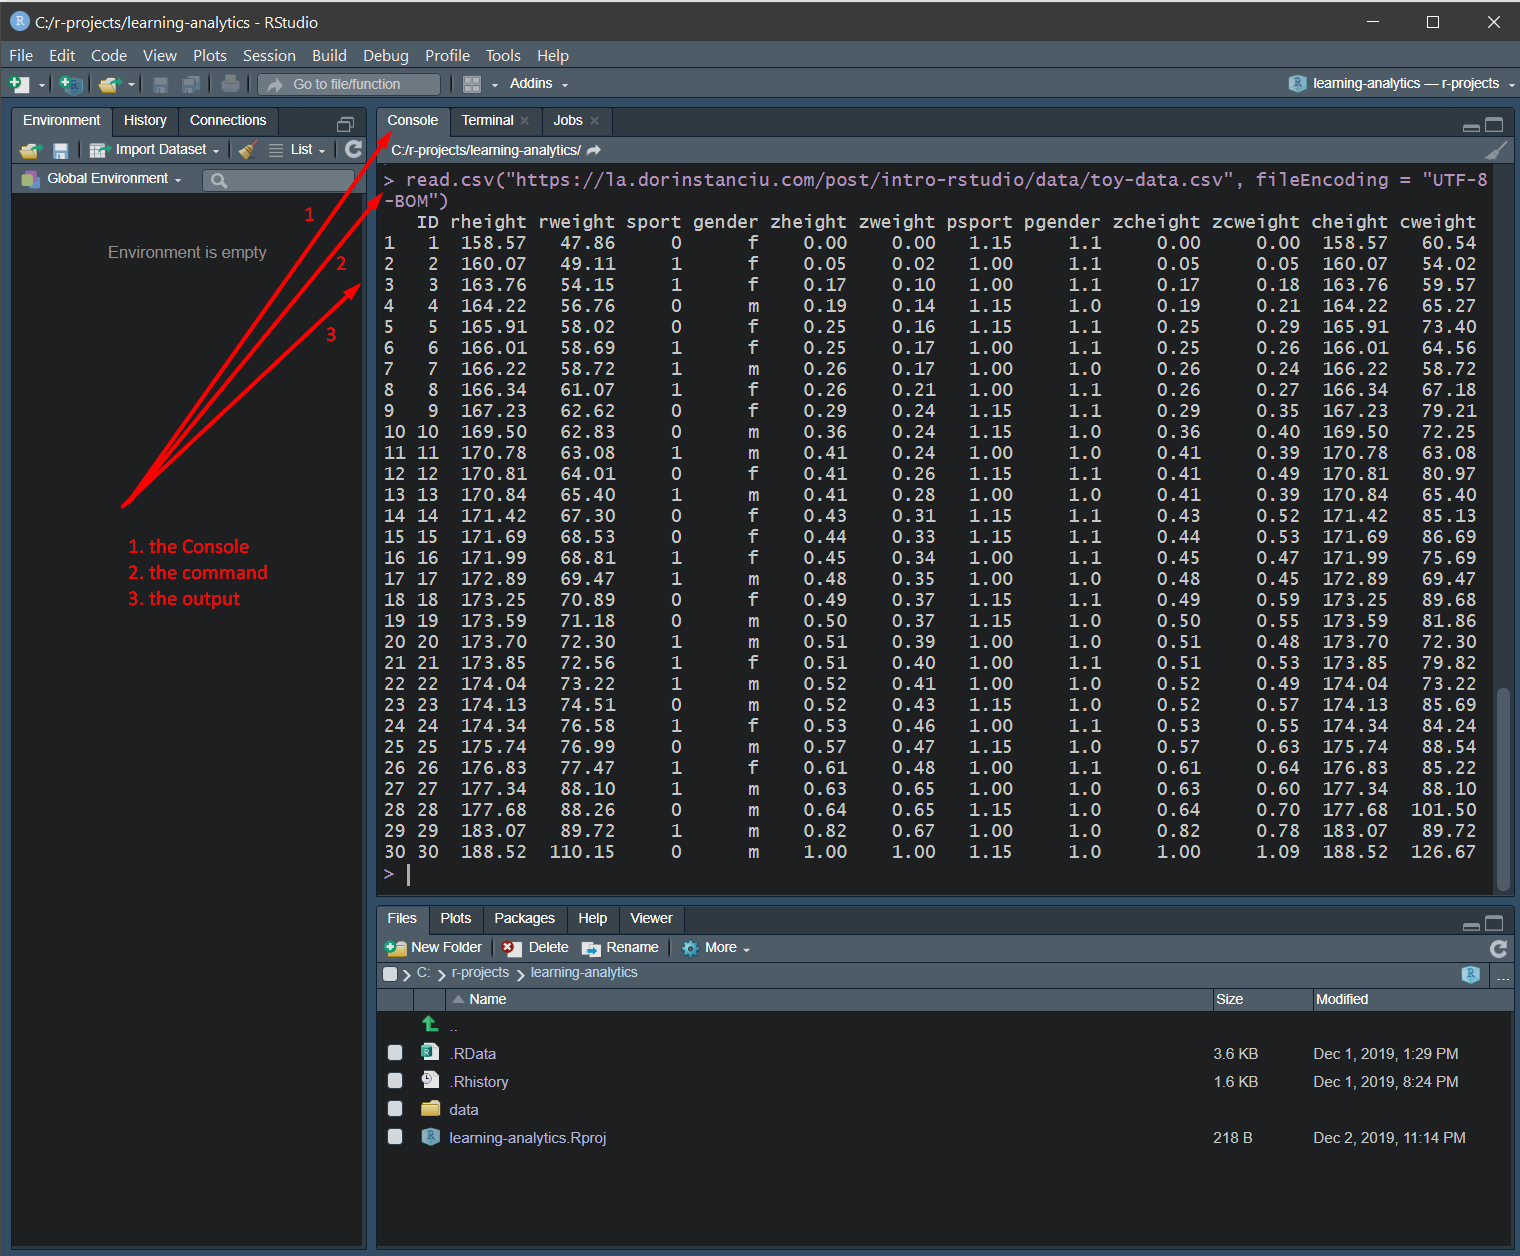
Fig. 8: Getting data into RStudio using command line written in the Console
as you can see, our data consists of a series of 30 observations, neatly laid out one after the other, each observation (or row, or case, or person) being characterized by 12 features, well, technically 13 if we include the ID (rheight, rweight, sport, gender, etc.).
There are other ways to get data into your project, and I’ll show you how as we progress through our tutorials. For now, though, I have proved my point, at least for this particular use case, i.e., there is very little that you cannot do from the R’s command line or from within R Studio (command line or otherwise).
By this time, you would have realized that you haven’t actually saved the data, but only rather ‘accessed’ it. You can still save it just by browsing to it, and using your computers ‘save/download’ capabilities, from a web browser. The reason for me stopping here is that saving data and working with it inside your R project is the object of another post. We’ll continue there, not only accessing the data, but really ‘importing’ it into R and saving it as an R object.
Last modified on 2026-04-23